Tuesday, May 31, 2011

Guest Posting at Craft Goodies

I am so excited to be guest posting over at Craft Goodies today!


If you have not been over to Craft Goodies it is definitely a must! 
Wendy is very talented and comes up with some great projects! 

Head on over and check out my post and check out the rest of her blog while you're there! 
You won't be disappointed!


Friday, May 27, 2011

Hey! It's me Sarah!


I am Sarah Lindsay's sister-in-law. Isn't she great!? I will let you know a little about me. I am a wife to a great husband.

And I like to say we have the cutest dog EVER! :)

I love anything crafty and decorating! Today I am going to show you a couple simple projects!
First I want to show you these mason jars I spray painted! All you have to do is grab some mason jars and whatever color spray paint you prefer and go to town. :)
I am trying to think of something to hold these on the wall... something like a plate holder in this picture but to hold these vases because I think that would be too cute. Are you seeing what I am seeing lol. Any ideas?

Next I took these cardboard boxes and sprayed them white, added some scrapbook paper and cut some vinyl lettering to label them for the bottom of my pantry! You could of course just throw a plain cardboard box in the bottom of your closet but I like pretty things!

Finally I cut a vinyl piece for my kitchen aid mixer! It is from the Story Book Cartridge and I did mine about 4".

Thanks for reading my post! I hope you enjoyed...any feedback would be greatly appreciated since I am new at this!

Sarah

Wednesday, May 25, 2011

Lack of posting...

Please forgive me for the lack of posting this week. My computer decided not to let me use the internet so until I figure that out, I will have to borrow a computer to post!

Also, we have had a lot of storms hitting our area this week along with many tornado watches and warnings. Today we have had multiple funnel cloud sightings as well as tornados touching down. Thankfully none have come into our area. My toughts and prayers are with all of those in Joplin and other areas that have been affected by the storms or tornados.

On a happier note, Beginning this friday, my sister-in-law Sarah is going to be posting a little something for you every friday! I can't wait to see what she's got in store for all of us!

Be safe and have a good week!

Saturday, May 21, 2011

Duct Tape Checkerboards

You've just got to love duct tape. Who doesn't? 
It now comes in a variety of colors and you can do just about anything with it! 

Last Christmas I took orange and black duct tape and made a checkerboard for my little brother so he could take it with him to college. He doesn't have much room for anything and I didn't want to give him something that would not be used. Recently, my older brother asked me to make one for him as well, so I thought I would share it with all of you!


These are awesome because they are thin, roll or fold up small, very durable, and you can wipe them off! 
And since duct tape comes in many colors, you can make them in whatever color you want!


The pieces were made from chipboard and covered in duct tape. Still trying to come up with a better idea for these. Got any ideas?


The colors are actually a little brighter than the picture shows.


On the back I taped over a snack sized ziplock bag so the pieces could be easily stored when not in use. 
I even put his initials on it with duct tape! 

Hope everyone had a great Saturday! Enjoy the rest of your weekend! 


Monday, May 16, 2011

Vinyl Giveaway!

There is an awesome vinyl giveaway over at A Girl and A Glue Gun today! 2 Winners! 

Head over there and check it out! 

Make sure you check out the rest of her blog while you're at it! You won't be disappointed! :)

Happy Monday!


Side table Makeover

Lately I have been looking for a new side table for my living room. I had a cute little white ladder, but now that the little one is crawling and pulling up, it just wasn't steady enough. 

Last week, the neighbors a few houses down had a garage sale and left both a coffee table and a side table at the edge of the road. They sat there all weekend and no one touched them. It took some convincing, but I finally convinced my husband to pick it up! (He thinks its ugly)


Okay, okay, I would have to agree...It is ugly. But...It's not it's fault! :) 

The people painted most of the table black, except the top (looks like they just covered it up) and the drawer. 

We needed a quick fix so we used some black spray paint I had downstairs for another project (darn, guess I'll have to go get more!) and focused mostly on the top and the drawer. 

 My handsome husband took it over for me.

Doesn't it look so much better!? 

And I feel much better that no one is going to pull the ladder over on their heads! :) 

This is what we did while daddy spray painted...


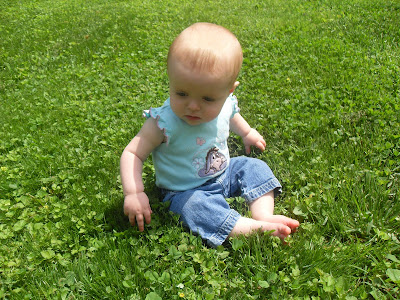
I guess its safe to say she's not crazy about the grass... Or anything else that tickles. 
Cracked me up that she wouldn't hardly put her foot down! :) 

Hope you all had a great weekend!!


Saturday, May 14, 2011

Garage Sale Goodies

I don't know about you, but I LOVE to garage sale! 

My mom instilled the love in me at a young age and we still go together all the time! We take my sister and the baby with us, and my dad will even go sometimes. (We're still working on my husband...lol)

Here are the bargains I got today! 

Here is an art board I got for $.25! It seems to have glue on it, but I think I can take a fine sand paper to it...Any one have any other suggestions?

I got these for $.50 each stack. The brown is cork board and the white are dry erase!
I'm thinking...craft room?

The table we got for $3. She loves it!

Here is my favorite thing I got today.....Fabric!! $1! For all of it! :)


A few of them are Amy Butler! The guy said had I been there 20 minutes earlier The whole table was full of fabric, but that's okay! I'm excited with what I got! 

I also got a few books for Jellybean as well as a beanie dog. But she kind of took over those so I didn't get any pictures. 

Do you like to garage sale?


Tuesday, May 10, 2011

Easy Photo Magnets Tutorial

My husband and I wanted to give our mom's something a little unique this year for Mother's Day. 
Chocolates melt, flowers die, but a picture is worth 1,000 words...right?? 
So we I came up with the idea to make picture magnets of all of their children, grandchildren, etc. (Thank goodness there are only 4 kids on each side and 1 grandchild!)


Are you ready to make some for yourself? Okay! Here we go! 

You'll Need:
Pictures printed into wallet sizes (not pictured)
Elmer's glue or Mod Podge
Magnets
Chipboard
Scissors
Pen
A strong glue like epoxy or model car glue (not pictured)
2 inch circle template


1. Using your circle template, draw a circle on your picture to mark where you will cut as pictured below. 

I used a clear quilting circle template which made it easier to see the picture to be sure I didn't cut anything important out. 


 2. Very slowly and very carefully cut the marked circle out of your picture removing any pen marks.


I placed my pictures in a baggie as I cut them so I wouldn't lose any.


3. Draw your circles onto your chipboard and cut out.


4. Using your Elmer's glue (or mod podge) put a thin layer on the chipboard circle using a paint brush or your fingers. Come on, use your fingers, you know you want to! Then gently place your picture on top.


5. After the glue dries (should just be a few minutes depending on how thick you layered it on) use your scissors to trim away any chipboard showing around the picture. Don't worry if the picture shows over the chipboard on the back, no one will see! 


6. Then apply a layer of glue on the edges and top of your picture to seal it up. 


It will make the picture look cloudy until it dries, but it will dry clear so no worries!


7. After letting these dry thoroughly, turn over and place a small amount of your strong glue in the middle of the chipboard. Then place your magnet on top and press down firmly. Allow the glue to dry according to directions, at least an hour.


8. Hang on the fridge for all to see! 


Hope you enjoy your magnets! I'd love to see a picture of them! 


Oh! JB says hi!


Saturday, May 7, 2011

Happy Mother's Day!

I never knew how much love my heart could hold until someone called me "mommy."-- Author Unknown


This beautiful girl now calls me "mama" and it melts my heart every time!

Born on July 11th, 2010 at 9:38 pm, 5 pounds, 13 ounces, 18 1/4 inches long.


I never knew how much my heart could swell until she graced us with her presence! 
I also want to say thank you to my Momma. 

Momma, I don't even know the words to thank you for everything you've done for me! For being there every time I have needed you. For raising me right, teaching me to cook, sew, clean, and live life as God would have me to live it. Thank you for coming to stay with me before the baby came and for staying with me every minute as I went through labor. You mean so much more than me than I could ever ever say!! I love you sooo much!!

I hope each and every one of you mamas (momma, mommy, etc!) have an absolutely wonderful Mother's Day!

Friday, May 6, 2011

Fingerprint Mother's Day Cards

How did May sneak up on us so fast?

And what about Mother's Day? Can you believe it is this Sunday?

We have a couple of projects in the works for Mother's Day, but so far only one is completed. So I thought I would share that with you today! 

Fingerprint Flower Mother's Day cards!


There are not alot of pictures for this tutorial, but most of it is self explanatory. Hard to take pictures while trying to use a 9 1/2 month old's fingers!  (Safe to say I got a little over ambitious with this project!!)

You will need:
Paper 
Scissors
Ink Pads or Paint
Paper Towels
Scotch Tape
Paint Brushes (if you are using paints)
Markers
Fingers!


(Pssst!!! Just a side note...This is my first tutorial! Yay!!! Okay, back to the project)

1. Take your paper and cut in half lengthwise if you want your cards vertical, or width if you would like them horizontal. I went with vertical.  It helped to fold the paper in half both ways (see above picture). I cut on the middle line, and then already had the other fold for my card!

2. If you are using ink pads, skip to the next step. If you are using paints, stay right here, I'll tell you how to do it! Take your paper towel and fold in half until about 2 in by 3 in. take a small piece of tape to keep it from unfolding. Place a very small amount of paint on your paper towel and spread out completely with a brush. You just made your own ink pad!


(Please excuse the pictures. That's what I get when I try to do with a baby in my lap!)

3. Use your little ones finger prints (or your own) to make the centers of the flowers. I did about 3 to each card in random spots. Then add your petals! After trying to get the little one to do the first flower, I decided to do one with my finger prints, and my hubby to do one as well!


4. Using your marker or paints, add stems and leaves to your flowers.

5. Tada! You have some beautiful homemade cards made with your own hands fingers! You can either leave as is, or add a little message!


I hope you have a wonderful Mother's Day!